

Amazon Fire TV Set-Up (Alternative Method).
Step 1:
Start your Fire TV / Fire TV Stick and Go to “Settings” and select “Network”

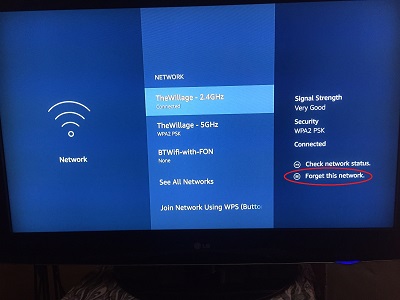
Step 2:
If already connected to a wireless network select “Forget This Network”
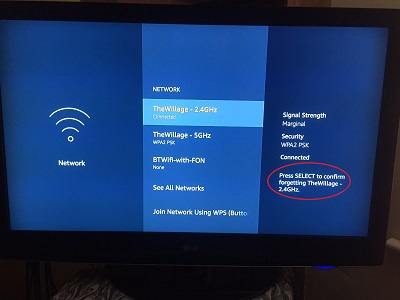
Step 3:
Press Select to confirm
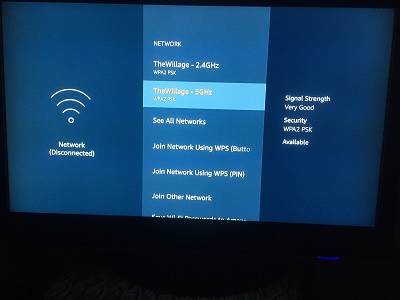
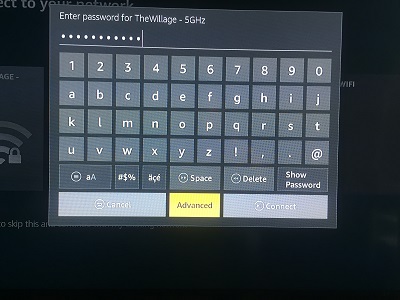
Step 4:
Now choose your Wi-Fi network again. You will be asked to enter your password. Enter your Wi-Fi password and click on “Advanced”
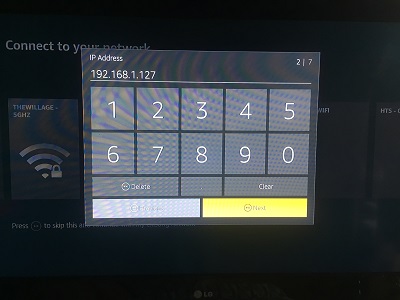
Step 5:
You have to enter an IP address that is similar, but not the same as another device on your home network. To do that follow our guide HERE. Take the device’s IP and add 5 numbers to it. eg. Your PC’s IP is 192.168.1.122 then for your fire TV use IP 192.168.1.127 Note that first three groups of digits remain the same and only the last group is to be changed. Make sure you include the dots!
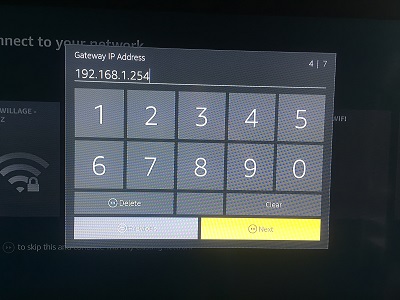
Step 6:
In the “Default gateway field” enter the IP of your router Gateway. Refer to the guide HERE and this is to be exactly the same for your Fire TV device. (it may or may not be different to 192.168.1.254 shown) and click “Next”
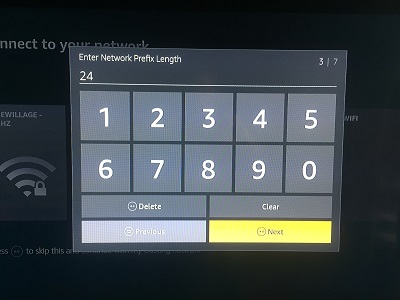
Step 7:
In the “Network Prefix Length” enter 24 and click “Next”
Step 8:
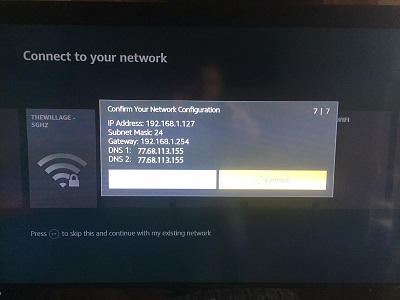
In DNS 1 enter 77.68.113.155 and click “Next”

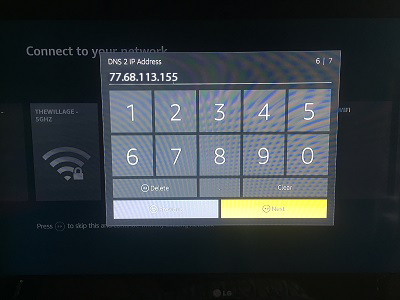
Step 9:
In DNS 2 also enter 77.68.113.155 and click “Next” to connect.
You should see something similar to this. Click “Connect”.
Step 10:
Go back to “Settings” menu and select “Preferences”. Then select “Time Zone”.

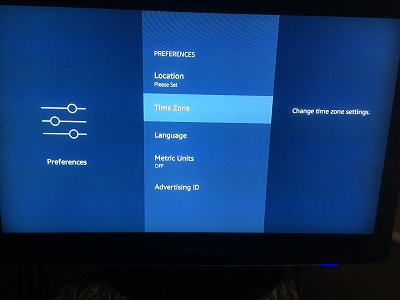
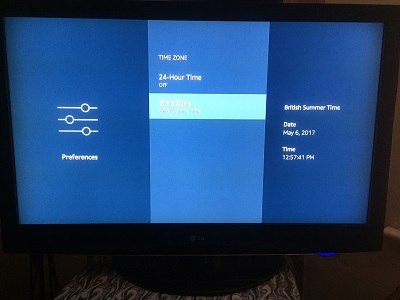
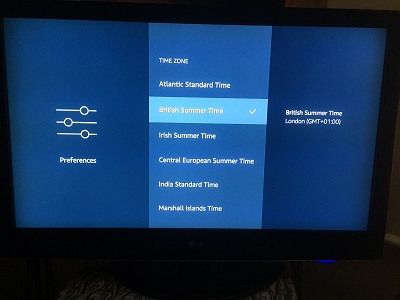
Step 11:
Select ““GMT” or “BST” (whichever is available)”.
Step 12:
That’s it, you’re done. You can now watch all your UK TV apps abroad! We recommend the TV Player app as it has all the live channels in one place. As explained above, make sure your network is registered using a PC, Mac or iOS device, this will register this device also. Note that although our service doesn’t buffer, there can be local connectivity issues that can cause buffering. In this case please power off and on your router and it should resolve.