

Table of Contents
- 1. Using ChannelHopper on your Mac
- 2. Using ChannelHopper on your PC
- 3. Using an iPad or iPhone
- 4. Using an Android device (Version 6.0+)
Some ISP (Internet Service Providers) and Public wi-fi, such as hotels and airports block DNS override so our main service will not work for everyone. Even though this is a low % of our customers we have created an alternative method of accessing our service. This service is limited to devices that allow a proxy URL to be entered so we have listed instructions for the 4 main ones that we know will work.
Once you have configured your device from the instructions below, return to the how-to page, select the device you are using and skip down to the ChannelHopper registration steps to complete the set-up of your device. Note that prior to using these instructions, if you have previously added our DNS to your device it is best to remove it first. Also note that although our service doesn’t buffer, there can be local connectivity issues that can cause buffering. In this case please power off and on your router and it should resolve.
1. Using on your Mac
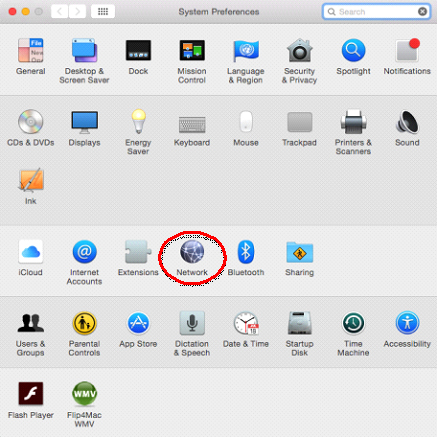
Step 1:
Open System Preferences and select Network
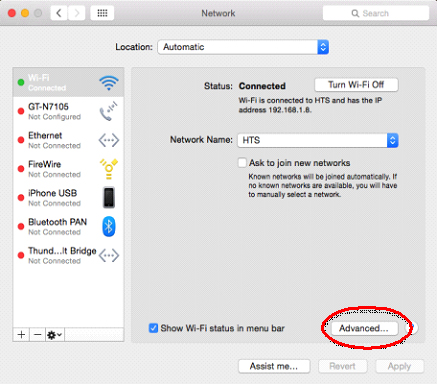
Step 2:
Select Advanced……
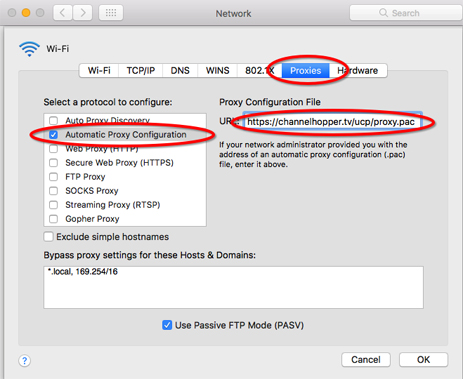
Step 3:
Select Proxies tab and select Auto Proxy Configuration and type in or copy paste https://channelhopper.tv/ucp/proxy.pac and click OK
Step 4:
Now login to your dashboard here: https://channelhopper.tv/login and make sure it says Proxy Connected and Network registered in green.
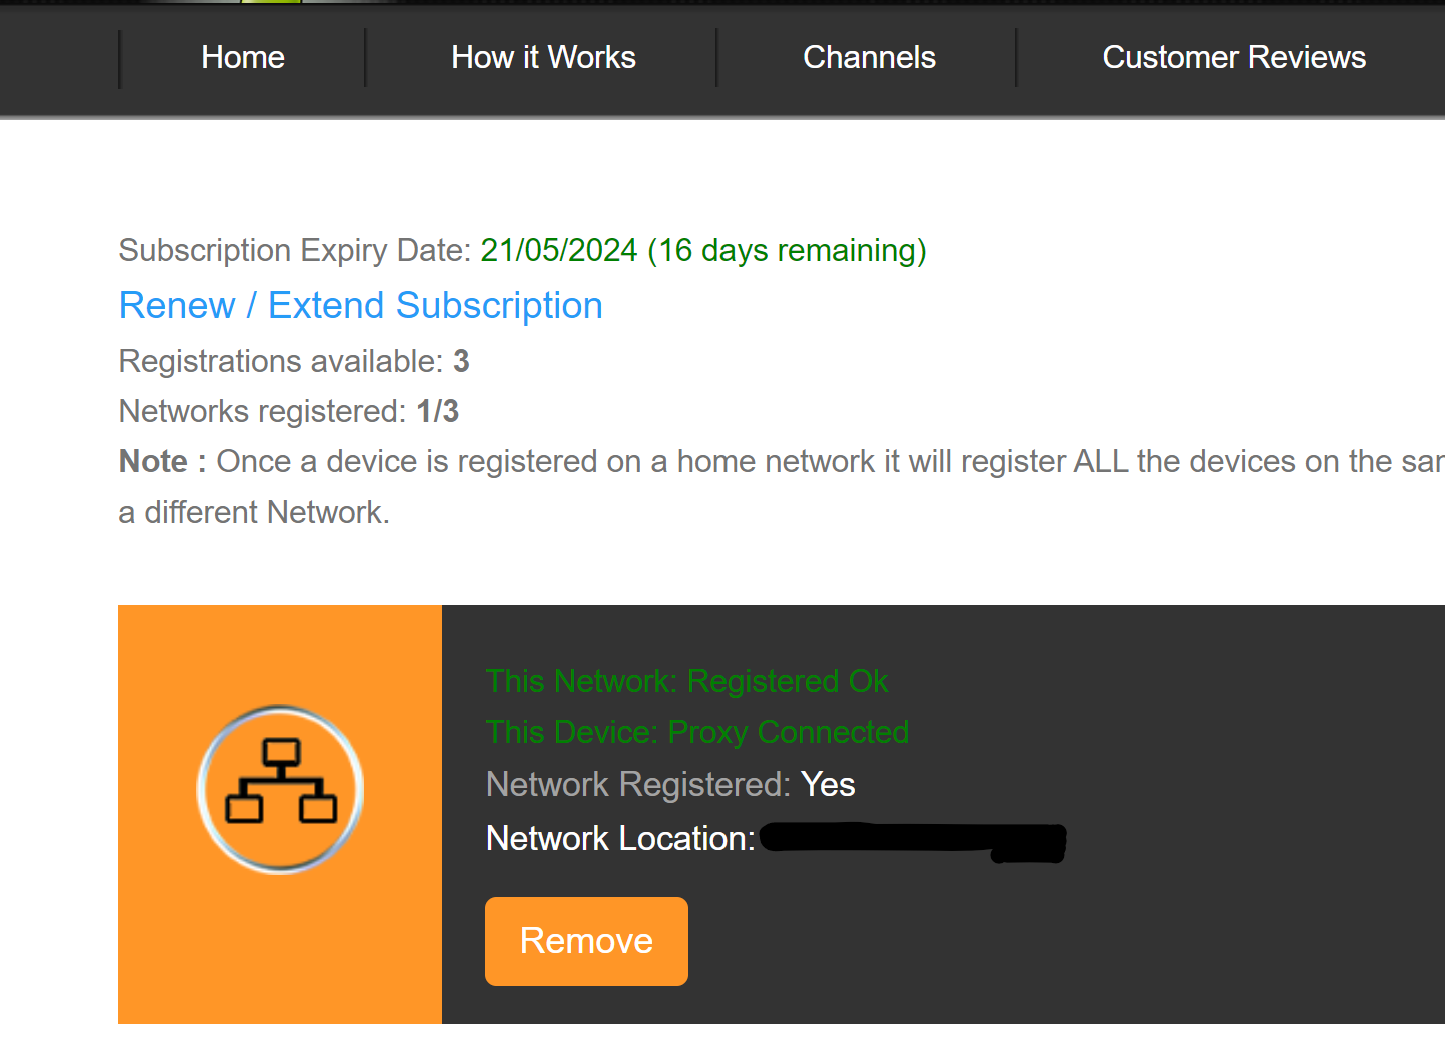
Now try the TV sites from our Channels Page and they should now work ok.
2. Using on your PC
Step 1:
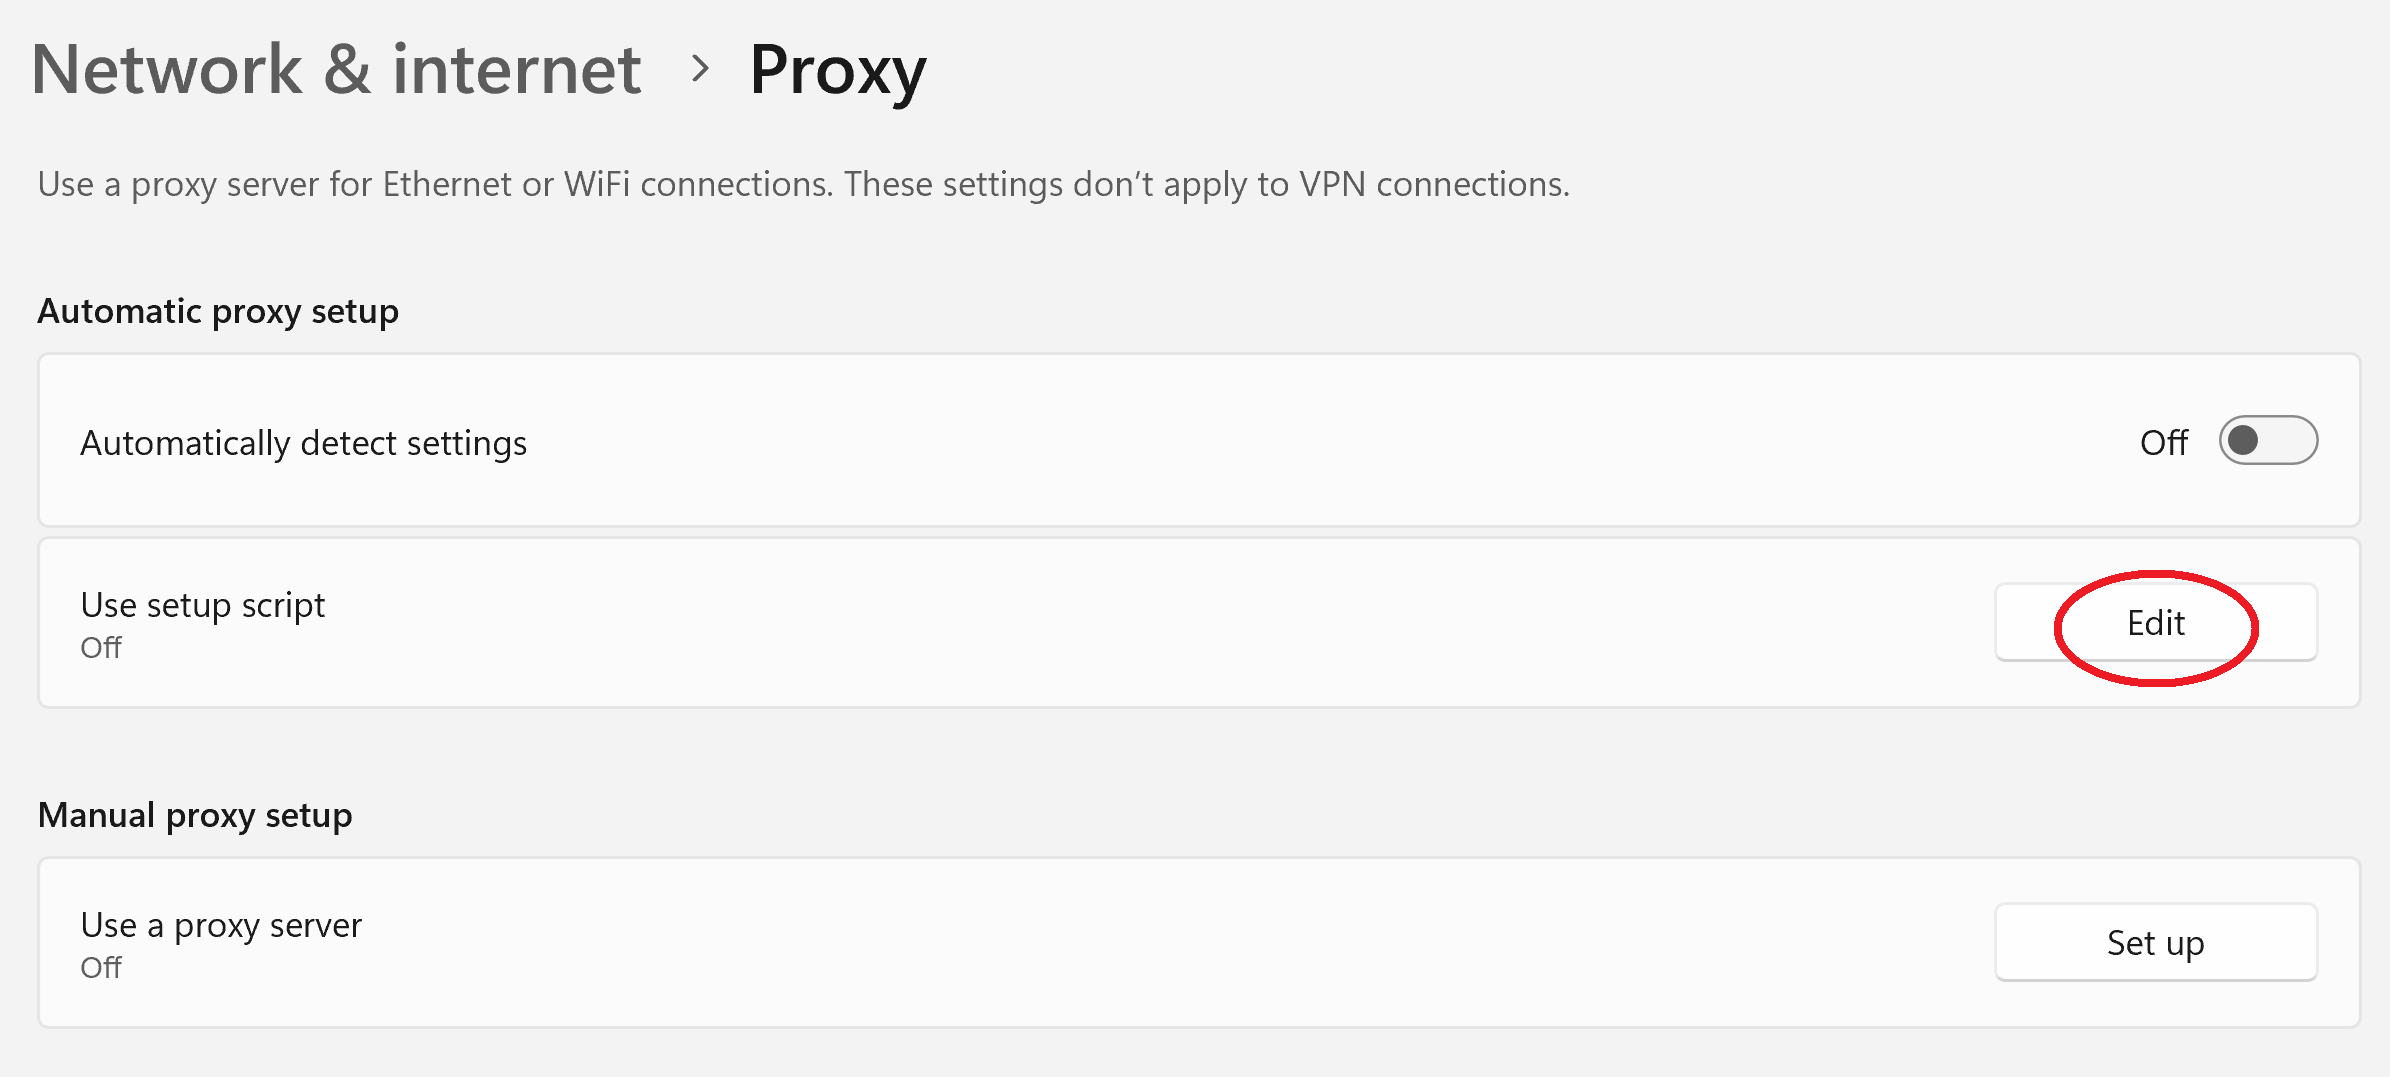
Click on the Windows Start Icon and type “proxy”. Select “Proxy Settings”.

Step 2:
Choose option 2 “Use Setup Script” Connections Tab and selectSet up
Step 3:
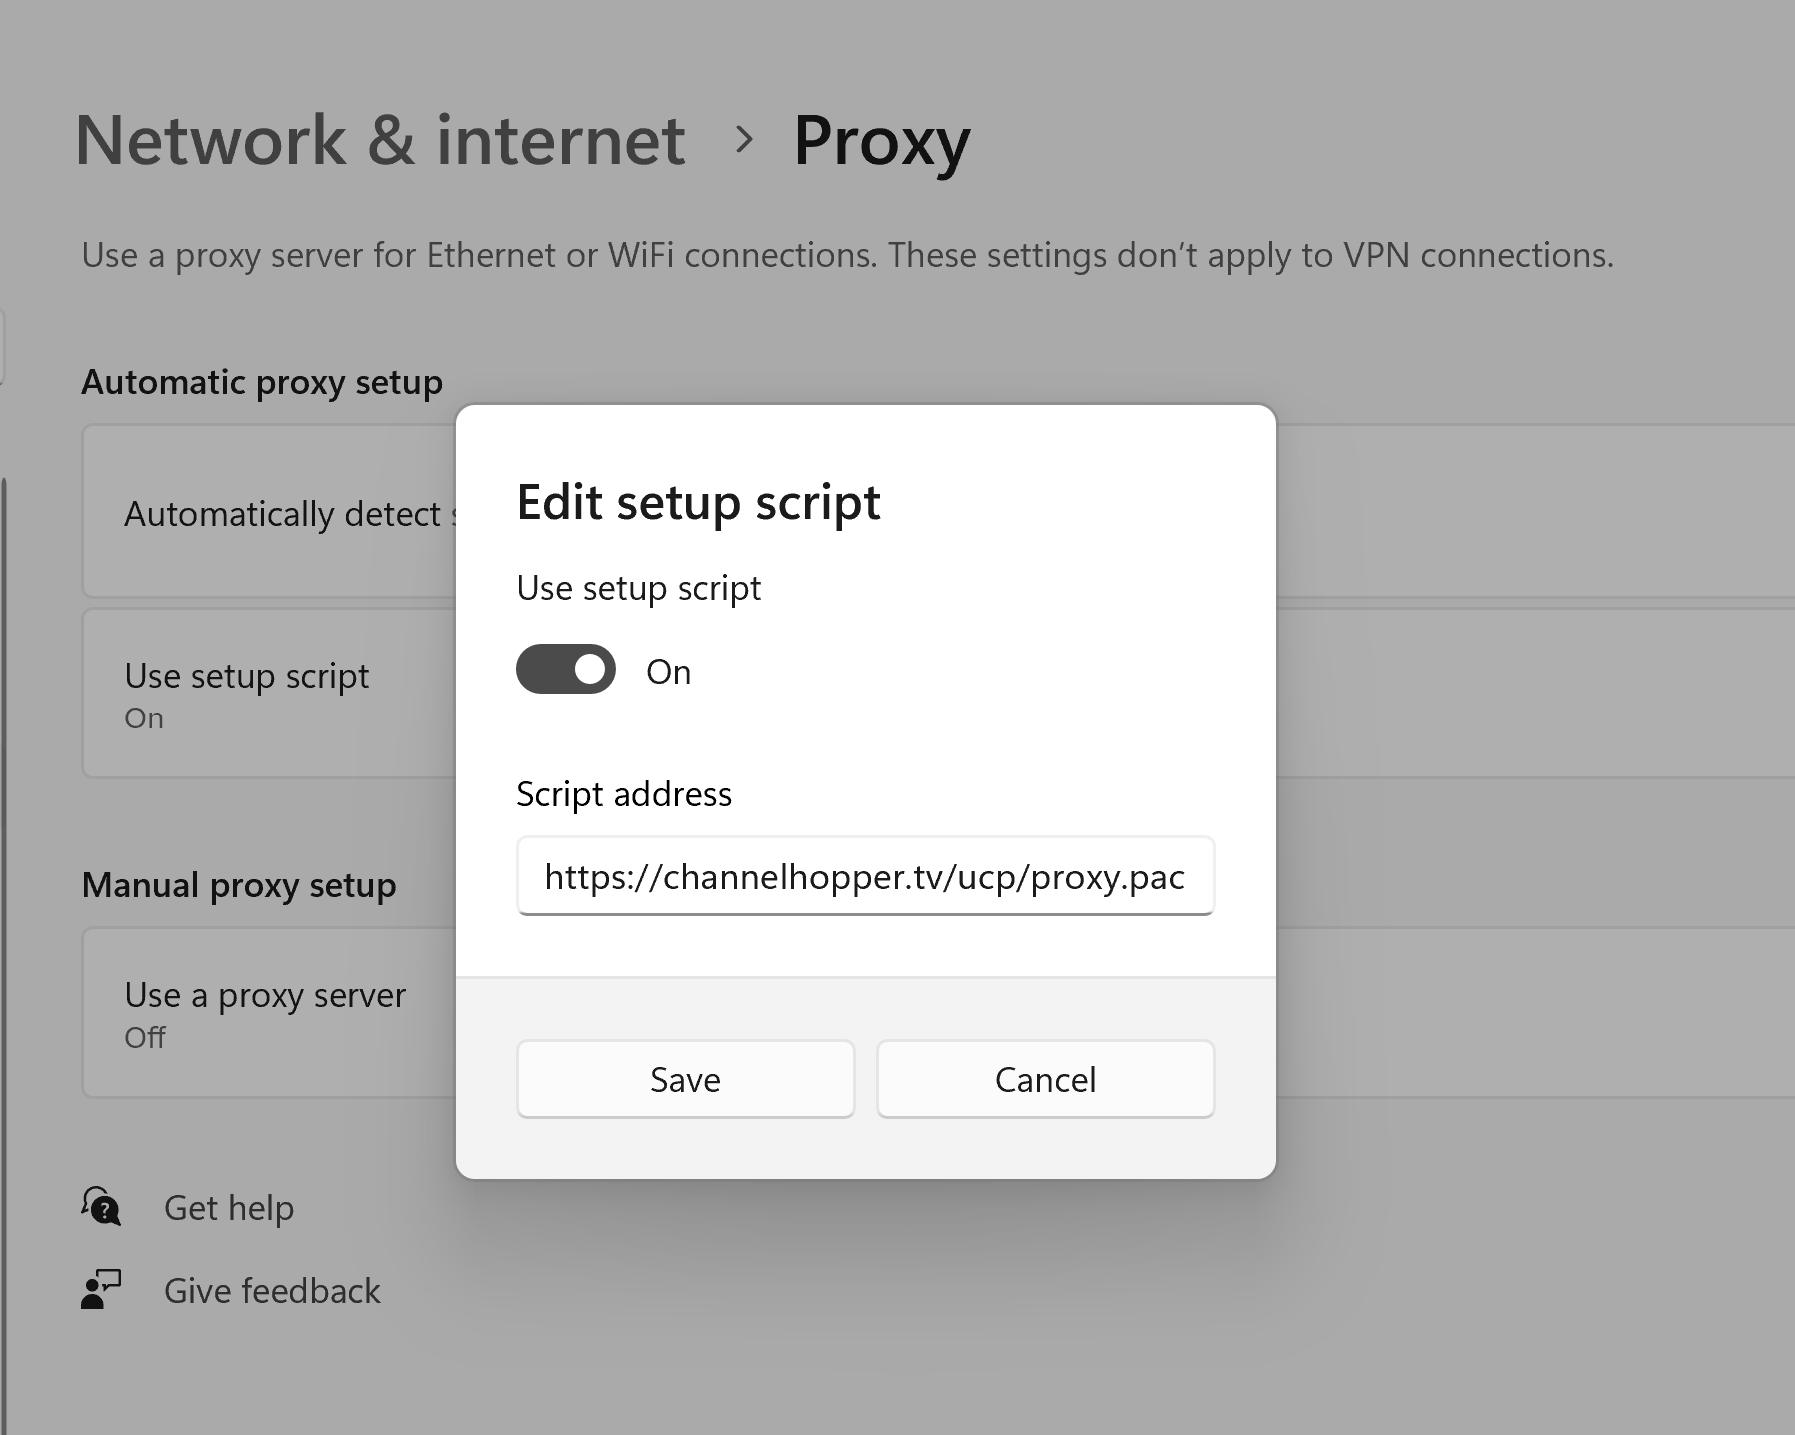
Toggle on and enter (or paste in) https://channelhopper.tv/ucp/proxy.pac and click Save
Step 4:
Now login to your dashboard here: https://channelhopper.tv/login and make sure it says Proxy Connected and Network registered in green.
Now try the TV sites from our Channels Page and they should now work ok.
3. Using an iPad or iPhone
Step 1:
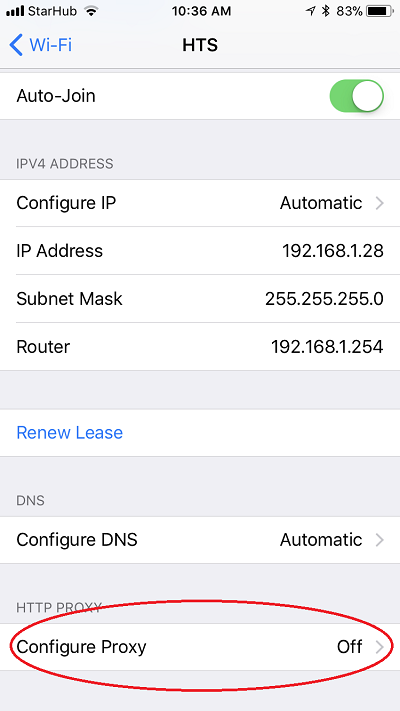
On your device go to Settings > Wi-fi then tap i next to your connected SSID.

Step 2:
Select “Configure Proxy”
Step 3:
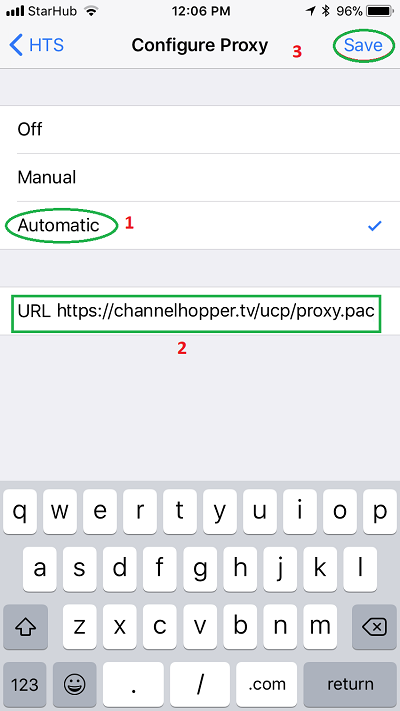
Select “Automatic” and copy paste the URL: https://channelhopper.tv/ucp/proxy.pac and click “Save”. You can exit the settings by pressing the home button on your device.
Step 4:
Now login to your dashboard here: https://channelhopper.tv/login and make sure it says Proxy Connected and Network registered in green.
Now try the TV Apps and they should now work ok.
4. Using an Android device (Version 6.0+)
Step 1:
Go to Settings > WiFi, Long tap on the name of the network you want to modify, and select “Modify network”
Note: on later versions of Android, you may have to select “Manage Network settings” or tap i to modify the network. Earlier versions of Android will have to be updated to use this service.
Step 2:
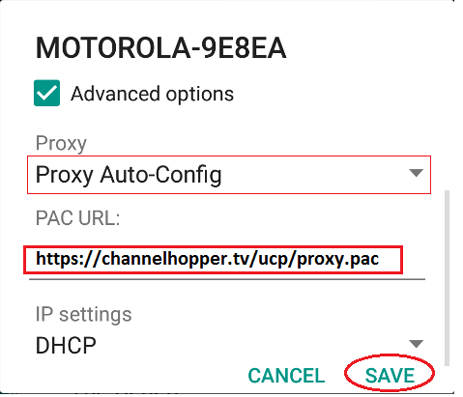
Under “Advanced Options” set the “Proxy” to “Proxy Auto-Config” then type in or copy paste https://channelhopper.tv/ucp/proxy.pac on the PAC URL page then Save.
Step 3:
Now login to your dashboard here: https://channelhopper.tv/login and make sure it says Proxy Connected and Network registered in green.
Now try the TV apps and they should now work ok.